Converting Video Footage to DVD

Once you have recorded a video onto your digital camera, you may want to burn it to a DVD so you can show it to people on conventional DVD players. This is a fairly easy process.
Getting Your Video From Your Camera To The Computer
Before you can think about burning a DVD, however, you’ll need to get your video footage from the digital camera to the computer. To do this, you’ll either insert your memory card from the digital camera into an appropriate memory card reader slot on your computer or you’ll use the USB lead that came with your camera to connect the camera to the computer that way.As soon as you do this, your camera software on the computer will recognise that you’re trying to do something with the camera and will usually automatically open up the folder in which your camera’s images are stored. Often, this folder will be broken down into two sections. One will contain all of your digital still images whilst another will contain your video files. Most digital cameras store video footage as either an AVI or MOV file.
Converting The Files
At this point, you can actually view any video footage on your computer in the present format (i.e. AVI or MOV). However, most DVD players cannot recognise these formats so before you can transfer your video to DVD you need to convert the files first.To begin with, checks to see what type of files are used to store your video footage. Then, you’ll need to download the appropriate software. For example, you’ll be looking for software online for transferring your video to DVD that is AVI to DVD or MOV to DVD compatible. A lot of the software programmes can convert both but check first.
There are many different software programmes available. Some will be free but often they’ll only convert a portion of your video or they’ll place a watermark on the converted video itself so you’re better off buying the full version when you download it. Once you’ve got the software installed, you’ll be asked to select a file that you want to convert so it’s a simple case of opening up the folder where your video footage is installed and clicking on the appropriate file(s).
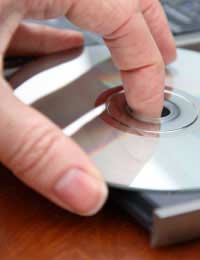
Getting The Converted File On To DVD
As you’re converting the file, the software will usually save the converted file into another folder as a VOB file. Once this has been completed, you’re then ready to burn your DVD. Select the relevant VOB file from the new folder and then click ‘burn to DVD’. Your computer’s internal or external DVD burner will do the rest.Things To Remember
When you’re burning a DVD of your video footage, there may be more than one VOB file stored in the folder as they are broken down into both separate sound and video files. Just choose the one single largest VOB file in the folder. That will be the one that contains the complete footage.Once the burning process is complete, then you can take the DVD out of the drive on the computer and test it on any conventional DVD player. Once you’re sure that the footage has been captured onto DVD, you can then delete the VOB files and original AVI or MOV files too, unless you want to keep them on the computer too.
If you’re going to be storing a lot of video footage on your computer, it’s better to get yourself an external hard drive storage device as using a lot of space to store video footage directly onto your computer will ultimately take up space and slow down your computer’s performance.

Re: Photography Copyright Law
Hello, My name is Kimberly Wood and I run a business selling movie DVDs, and Blue-Rays. Both music and movies for me have always…
Re: Storing Your Photos Online
Flickr is fine just as a photo site, but plenty of people put pictures in albums on Facebook, for example, which is one way to store…
Re: Developing Your Own Film and Darkroom Basics
Hi, Please send me the details of new set up of digital color lab and having any expenses and cost of…
Re: What is the Copyright on Old Photographs to Use as Calendars?
Hi, I have an old photograph I got at a flea market, (a snapshot) that I want to use…