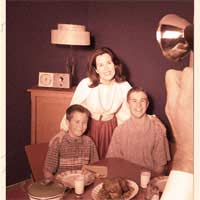
Repairing Old Photos

For the majority of people the purpose of becoming proficient in basic digital manipulation is to be able to correct imperfections and add artistic flare into their own images. However, there is a small industry of individuals and organisations that have cornered the market in the repair of old photographs. There is no reason, though, why you should have to employ someone to bring your prized family heirlooms back up to scratch; learning to get these images back to a state in which they can be successfully reprinted is a task which can be explored by anyone.
Removing a Cast
The digital repairs that you will need to make will depend entirely on the damage done to the image. There are, however, several common ways in which old prints degrade, and therefore several common processes which are undergone to try and reverse this degradation. Perhaps the most common of these is the gradual de-colouring of the print, eventually rendering the image either sepia or a very dull version of its previous self. In the case of the former, removing the sepia cast from your images is not too difficult.In Photoshop, you have two options. In the Image / Adjustments menu you will see an option called Hue and Saturation. This tool is described in more detail elsewhere on this site, but for our purposes you need to de-saturate the image by moving the Saturation slider to 0. If you want more control, choose specific channels from the drop-down menu rather than simply adjusting the master channel. Alternatively, to remove the sepia from your image you can create a new Adjustment Layer, and add a Photo Filter. Change the colour of the filter to black, and bring the Density up as high as you require.
If your image has not become discoloured, but has lost its vibrancy, there are also ways of solving this. Using a combination of the Levels and Curves tools, you can select individual channels within your image to adjust. In Curves, for example, you will see a graph of the light intensity in the image, and you can move it as you please. This allows you to adjust very selective parts of your image in order to return it to a natural-looking state. You may also wish to use the Brightness and Contrast functions, but these should be utilised sparingly; where Levels and Curves allow the user to choose specific groups of pixels to change, Brightness and Contrast affect the entire image at once and may therefore produce sub-standard results.
Scratches and Imperfections
Another particularly common problem with old photographs is the appearance of scratches and general ‘noise’ within the images. Although this is slightly harder to fix than discolouration, it is also perfectly possible in Photoshop. To begin with, you may wish to look at the Reduce Noise filter in the Filters / Noise menu. This filter gives you a variety of options which are designed to reduce digital noise produced by a camera, but it can also be useful for us.The required settings will vary completely depending on the image in question, but one of the key factors is to balance the Strength fader with the Sharpen Details fader in order to produce an effect that does not look unnatural.
Aside from the Reduce Noise filter, there are a few other ways of getting rid of scratches. The first of these is the Dust and Scratches filter, which works by looking at a certain distance (set by the user) away from individual pixels in order to find ‘unnatural’ forms. This can be useful, but tends to provide you with unnaturally blurred images; use this sparingly, and in tandem with a sharpening tool.
Finally, however, you may also find the Clone Stamp tool useful. This allows you to ‘paint’ certain parts of the image with a copy of another part. You can set the cloning point anywhere on the image, and simply use the tool to transfer what is at the clone point onto wherever you desire in the image. This is particularly useful if, for example, there are scratches or dust on a blank background, or certain patterns or colours occur several times throughout the image. This tool is covered in more detail elsewhere on this site.The key to repairing old photos is to ensure that you end up with a natural-looking final product. Over-sharpening or overly-judicious use of noise reduction may render the image unusable, but for the opposite reasons to those which caused you to start in the first place.


Re: Photography Copyright Law
Hello, My name is Kimberly Wood and I run a business selling movie DVDs, and Blue-Rays. Both music and movies for me have always…
Re: Storing Your Photos Online
Flickr is fine just as a photo site, but plenty of people put pictures in albums on Facebook, for example, which is one way to store…
Re: Developing Your Own Film and Darkroom Basics
Hi, Please send me the details of new set up of digital color lab and having any expenses and cost of…
Re: What is the Copyright on Old Photographs to Use as Calendars?
Hi, I have an old photograph I got at a flea market, (a snapshot) that I want to use…