Developing Your Own Film and Darkroom Basics

Processing photographic film is still something of a mystery to many photographers. With the increasing popularity of digital the art of development has very much taken a back seat for most amateur photographers – and, indeed, for many professionals. However, there are still those who use their own darkroom to process their photographs, and many who wish to learn.
Attractions
There are two great attractions for those who stand by their own darkrooms. The first of these is cost; paying a pro lab to develop rolls and rolls of film is not a cheap proposition, particularly when analogue processing costs are rising as it becomes more of a niche occupation. Furthermore, the number of un-needed shots developed seems, to many, to warrant the initial costs of setting up a darkroom.The second attraction is control; darkroom enthusiasts point out that the photographer has total control over the actual act of taking the photo, but that the processing is overlooked. Many of the great film photographers, most notably Ansel Adams, have seen the darkroom simply as an extension of the artistic act of photography.
Setting up a darkroom need not be too expensive. Perhaps the most difficult factor to contend with is finding space; the area in which you set up your equipment needs to be light-free (obviously), and also needs running water. Many people use a spare bathroom, but obviously fairly few individuals find themselves in possession of such a thing. It is, however, possible to use ‘portable darkrooms’. These do not require a light-free environment, but the downside is that they need to be set up and put away at the beginning and end of every session.
Wet and Dry
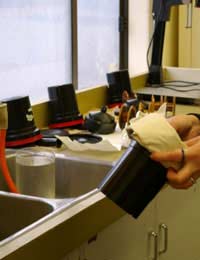
The work that is performed in a darkroom can be divided into two parts: the ‘dry’ part and the ‘wet’ part. Dry work involves activities like transferring the film into the developing tanks, as well as enlarging, trimming prints and so on. The wet work includes the development, and mixing chemicals – the actual processing is the wet work. It is always recommended to keep your darkroom divided in two; one side should be the wet side, and the other the dry.The first part of the darkroom development process involves transferring the film onto a spool and then into the developing tanks. If you have a light-proof room then this isn’t a problem, but if you are using a portable darkroom then you will need a changing bag in which you can keep the film from coming into contact with light. After this, the major parts of the process are the mixing of the chemicals and the timing of the development.
Chemicals
The required solution will depend on your choice of chemicals, but they will come with a table of instructions in which you will find the correct make-up of the solution. Similarly, the amount of time that you should keep your film in the solution will also depend on the chemicals; as unlikely as it sounds, at its most basic sense this is very much a case of following the instructions.The equipment required for a darkroom is covered in an article elsewhere in this article. Once you have the necessary kit, you could soon be the proud owner of your first self-developed print!


Re: Photography Copyright Law
Hello, My name is Kimberly Wood and I run a business selling movie DVDs, and Blue-Rays. Both music and movies for me have always…
Re: Storing Your Photos Online
Flickr is fine just as a photo site, but plenty of people put pictures in albums on Facebook, for example, which is one way to store…
Re: Developing Your Own Film and Darkroom Basics
Hi, Please send me the details of new set up of digital color lab and having any expenses and cost of…
Re: What is the Copyright on Old Photographs to Use as Calendars?
Hi, I have an old photograph I got at a flea market, (a snapshot) that I want to use…