Building Your Own Darkroom

Consider the care that a photographer takes when composing an image. Significant time and effort is put into ensuring that the picture is well framed, and that the camera settings are correct for the surroundings. Were you to allow another individual to perform this process for you, it is unlikely that you would consider it your image. It is strange, therefore, that most film photographers entrust their finished rolls to their local pharmacist to develop. If you wish to take control not only of the act of taking the picture but also of developing it, you may consider building your own darkroom.
Water and Light
The first major concern when building a darkroom is location. There are a number of prerequisites that must be fulfilled; primary amongst these is the availability of clean running water. Many people convert a spare bathroom into a darkroom, but it may well be that you need to re-plumb a separate room. After this, it is vital to ensure that the room is completely light-proof. It may not be necessary to buy specialist equipment to achieve this. In fact, a garden centre may well be able to provide thick black plastic that should suit the purpose. Several sheets may be required to completely block out light from any windows.Ventilation is also of paramount importance. The development process requires the use of potentially hazardous chemicals, and you should not be stuck in an airless room with the fumes that they will produce. It may be necessary, therefore, to install a ventilation unit to ensure that fresh air enters the room and the fumes have a means of exit.
Organisation
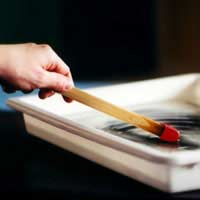
Darkrooms require a 'wet side' and a 'dry side'. It is important, therefore, to consider the layout of the room carefully. The developing tanks and processing equipment will be placed on the wet side, while the enlarging and printing processes will take place on the dry side. It is clearly vital that these two workflows are kept separate in order to prevent accidents.The ventilation unit should be placed above the wet side, and the wet equipment should be placed in a specific order. Developing tanks should come first, followed by stopping and fixing equipment. Finally, there should be a wash basin at the far end of the worktop. This order mirrors the development sequence, and minimises the risk of accidents occurring while moving materials between equipment.
It is clearly impossible to work in complete darkness, and a safelight is therefore necessary. This is a light fitted with an amber bulb, which can safely remain on while development is in progress. The wattage of this light is important; it should be sufficiently bright that you can see what you are doing, but not bright enough to affect your prints. Before trying your first development, leave a small object on a piece of photographic paper with the safelight on. If, after development, the object leaves an imprint on the paper, the light is too strong. Reduce the strength of the light until your paper is developed without blemishes.
Building your own darkroom need not be a huge amount of work. Furthermore, darkroom equipment is now readily and cheaply available second hand. With a bit of effort, it is perfectly possible to take the development process into your own hands.
Business Energy With a Difference
If you are looking for business energy or need advanced solutions like remote energy monitoring, new supplies, downgrading or upgrading capacity, have a no obligation chat with Purely Energy.
To find our more get in touch here. or call 0161 521 3400.


