Night Photography

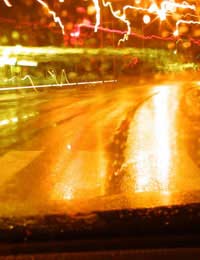
Light is of course, the key to photography. One need only look at the word itself (from the Latin, literally, to paint with light) for evidence of this. As a result, many amateur photographers find night-time photography a great challenge; a lack of available light makes life difficult, both because of the problems of exposure and also because of the difficulties encountered when trying to focus.
Long Exposure
There are a number of common techniques which are used to tackle the problems of night photography. One of the most often-used of these is a long exposure. Essentially, the longer the film or sensor inside your camera is in contact with light, the more highly exposed the image will be. At night there is less available light, and so a longer exposure is required in order to create the same results as would occur during bright sunlight. You can, therefore, use the shutter speed to help you achieve an exposure at night. It is likely that you will need to have the shutter open for some time; even in city areas it is perfectly possible that you would require a shutter speed of as much as 1/25. This, however, presents its own problems. In the first instance, any movement in the scene will almost certainly cause blurring in your images. In reality, there is very little that you can do about this, other than use it to artistic effect. Images, for example, of busy squares in which static objects are in sharp focus and moving ones are blurred can be highly effective, particularly when there is an interesting mix of blurring and sharpness.Shaking
If the problem is that the camera shakes in your hands while the shutter is open, then there are ways to combat it. A camera mounted on a tripod or monopod is considerably less likely to shake than one held in your hand, and so you may well find such equipment useful. If you are using a particularly long exposure time, then you may also wish to use a cable release. This device attaches to your camera and allows the user to release the shutter from a button on the end of a cord. This removes the need to touch the camera at all.Flash
Another common way of coping with night-time photography is to make use of a flash. If you have a compact camera then you are immediately faced with the problem of a lack of ability to direct the beam. This is likely to result in a washed-out foreground and an underexposed background, particularly bearing in mind the low power of such flashes. However, you may wish to experiment with fill flash. This is designed to illuminate areas of deep shadow in images, and can be perfect for giving a fairly even light during a night-time scene. You should remember, however, that you should always set your aperture and shutter speed in order to expose for the background when using fill flash.If you have a directional flash gun, then you should look around for reflective surfaces off which you can bounce the beam. This will diffuse the light, creating a far more natural look. In both of these cases, you may also find it useful to read the article on the Inverse Square Law elsewhere on this site.
Business Energy With a Difference
If you are looking for business energy or need advanced solutions like remote energy monitoring, new supplies, downgrading or upgrading capacity, have a no obligation chat with Purely Energy.
To find our more get in touch here. or call 0161 521 3400.