Incorporating Sound

Once you have mastered the art of video editing you may well find that you can now produce well thought-out, beautifully put together pieces of footage which engage the viewer and hold their attention. However, regardless of how good your editing is, footage can always be let down by dodgy sound; you can have the best shots in the world, but sub-standard audio will still make your video appear amateurish.
Premiere
Luckily, help is at hand in the form of your video editing software. As was mentioned in the previous article, there are a huge number of packages available for these purposes, varying greatly in price. The availability of software such as iMovies and Windows Movie Maker has opened up editing to everybody, but there are certain things that they simply can’t do as well as their ‘big brothers’. If you are going to be editing with any frequency, downloading a trial copy of Adobe Premiere; this software is a cut above the rest, not least for sound purposes.In the same way that you capture clips, so too does audio sit in blocks on the timeline, ready to be moved or altered. Again, you can add keyframes to audio clips in the same way that you can with video, in order to begin or end a change in state of the sound. In most cases, your audio will sit on several tracks on the timeline, all of which will be bunched together either above or below your different tracks of video. This means that you can create effects like crossfades with the minimum of effort.
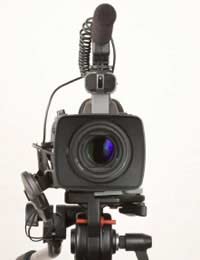
Microphones
To begin with, it is worth saying something about microphones. On-camera microphones, particularly on cheaper cameras, tend to leave a lot to be desired. If, for example, you are recording speech indoors, you are likely to get almost as much room reverb as you are speech, resulting in a boomy, tinny sound. In order to combat this, you can get clip-on mics of the sort that TV presenters wear. You can pick up basic models of these for very little money, but the difference that they will make is astounding. Alternatively, if you are recording a lot of audio outdoors, you may wish to invest in a decent directional microphone; these can normally be attached by a bracket to your camera, and will again provide superior audio quality.Having imported your audio, you can now start editing and adjusting it. To begin with, you may wish to alter the volume; this can be done very easily in Premiere by clicking the down arrow at the side of the relevant track. This will open up a volume ‘lane’ on which you can draw keyframes at your desired volumes. Using keyframes you can also manually create crossfades, by moving two pieces of audio (on separate tracks) in such a way that they overlap. You can then reduce the volume on the first while increasing it on the second.
Premiere also comes with a number audio plug-ins which can be of great use not only for creating interesting effects but also for repairing sub-standard audio. The Clip Reduction tool is of particular use if you have audio which is distorting. The range of plug-ins available is quite staggering; experimentation is the key!

Re: Photography Copyright Law
Hello, My name is Kimberly Wood and I run a business selling movie DVDs, and Blue-Rays. Both music and movies for me have always…
Re: Storing Your Photos Online
Flickr is fine just as a photo site, but plenty of people put pictures in albums on Facebook, for example, which is one way to store…
Re: Developing Your Own Film and Darkroom Basics
Hi, Please send me the details of new set up of digital color lab and having any expenses and cost of…
Re: What is the Copyright on Old Photographs to Use as Calendars?
Hi, I have an old photograph I got at a flea market, (a snapshot) that I want to use…