Framing Your Photos

Photography is often a frustrating pastime; missing that perfect shot or developing a roll only to find that there is nothing on it that you are happy with, can be a particularly depressing experience. However, when it works out it is immensely satisfying, and it is perfectly understandable that photographers often wish for the shots that worked to take pride of place on their walls. In these instances, you may well consider having some of your photos framed.
Foam Board
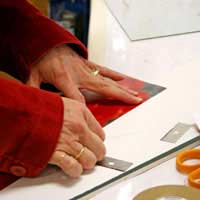
Displaying photos well is an art in itself, and it can be an expensive one. However, if you find that you can’t afford to frame your images but you would still like to display them, then you might consider using a material called foam board. This is a thick board made with a polystyrene interior, and which is used for mounting images. It is now perfectly possible to get sizeable enlargements made for very little money (or virtually nothing if you have your own photo printer), and you could try attaching one of these to a sheet of foam board.Most art shops will sell heavy-duty double sided mounting tape, which is ideal for this job. Simply stick the photo onto the board and use a scalpel to cut around it. If you have any rough edges you can wear them down with sandpaper, and you should have some very professionally presented images.
Many digital photographers have taken to adding frames to their images in post-production. There is something of a fashion for adding ‘film holes’ to the outside of images in order to lend them an ‘authentic’ feeling, a la Cartier-Bresson. This is very easy to do in Photoshop; simply search the internet for film spool brushes and use the brush tool to add them. Alternatively, there are also images of blank negatives available, onto which you can just place your images.
Photoshop
Most photographers, however, prefer a simple black or white solid border. This can often give extra impact to an image, particularly if it is, for example, a centred portrait. The trick here is to ensure that the border is not too thick; the point is to give extra impact to the image, rather than to detract from it. This is also very easy to do in Photoshop, and there are two possible methods.The first of these can be achieved by selecting the Canvas Size option from the Image menu. If you click the checkbox marked Relative, the boxes containing the size of your image will set themselves to 0. You can then type in the size of your desired border, and select the colour you want from the drop-down menu at the bottom of the dialog box. Click OK, and you will have a border. (You should note that, if you have several layers in your image, you should flatten the image first in the Layers menu.)
The second method for creating frames in Photoshop revolves around layers. In the Layers palette, try creating a new Solid Colour layer. This will produce a block of the colour of your choice which will cover the entire canvas. If you move this layer to the back (by dragging it to the bottom of the list in the Layers palette) you will then be able to resize your image and thereby create a border of a size of your choice.
‘Real’ Frames
If you wish to make prints and have these framed by a professional, you should think hard about the colour and type of frame that you desire. The framer should be able to help you with this decision, but there are a few tips that you might wish to consider. If you look around a gallery, you will generally see that photographs are framed with a large space between the edge of the image and the frame itself. This space, known as a mount, helps to give extra impact and ensures that the frame does not become a distraction. If you would like to add a mount, try picking a neutral colour that matches one of the major colours in the background of your image.Furthermore, the colour of the frame is important. If you are framing a black and white image, a thin black frame is generally the first choice. If the image is colour then it will depend on circumstance; remember not to choose too distracting a colour or pattern of frame and you should have your favourite image in pride of place in your house very soon.

Re: Photography Copyright Law
Hello, My name is Kimberly Wood and I run a business selling movie DVDs, and Blue-Rays. Both music and movies for me have always…
Re: Storing Your Photos Online
Flickr is fine just as a photo site, but plenty of people put pictures in albums on Facebook, for example, which is one way to store…
Re: Developing Your Own Film and Darkroom Basics
Hi, Please send me the details of new set up of digital color lab and having any expenses and cost of…
Re: What is the Copyright on Old Photographs to Use as Calendars?
Hi, I have an old photograph I got at a flea market, (a snapshot) that I want to use…