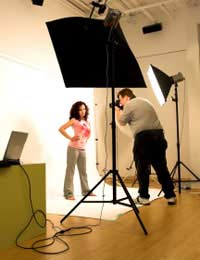
Basic Studio Lighting

When you are considering taking photography a little further there are a few options that you might consider. You might well think about upgrading your camera, or exploring other formats; perhaps if you are currently working in digital, you might give film a try. However, if you find that you are mainly doing portrait work, there is one obvious first area to expand into, and that is lighting.
Lighting is a difficult thing to get right without the proper equipment. Even the most occasional photographer will be familiar with the annoyances of on-camera flash; washed-out images and a lack of control over the quality or direction of the light is enough to destroy the best-composed image. The aim, therefore, is to be able to exercise as much control over the lighting state as possible. The key to successful lighting is, of course, experimentation (no two subjects will ever be the same), but there are a few basic techniques that it may be useful to familiarise yourself with before you begin.
Back Lighting
The first of these is back lighting. This is an important technique, which can be carried out with the minimum of equipment. Back lighting can produce dramatic effects, and is often used by portrait photographers either on its own or combined with other lighting techniques, as it can often be a very flattering way to light a subject. To begin, the subject should be placed in front of a large light source. This could either be a high-powered light, or a smaller light fired into a large reflector.The second of these scenarios uses the reflector as the light source, and can produce a much softer quality than the first. In front of the subject another large reflector should be set up, off which the light from behind will bounce. This again produces a soft light which is effective for covering blemishes. If the reflector is angled so that the light falls directly onto the subject then they will be lit flatly, without much accentuation or shadow. On the other hand, if the reflector is angled so that the light falls to one side, then it is also quite easy to produce effective shadows and emphasise the three-dimensional nature of the subject.
Short Lighting
Another popular lighting technique, sometimes known as short lighting, also involves only one light but in a different configuration. With this technique, the light source is placed in front of the subject, but to one side. The light is then fired into a reflector on the opposite side of the subject, which is angled towards the side of the face.The subject should sit at a slight angle to the camera, so that the light from the reflector falls on the side of their face nearest to the lens. This produces an effect whereby the farthest cheek is most highly lit, also illuminating the eyes. This can result in very striking images, particularly when shot in black and white, which are popular amongst actors for ‘headshots’.
There are, of course, many other ways in which you can light a subject – the options are countless, in fact. Once you have acquired some more light sources you can begin to experiment with multiple-bulb lighting, which can produce even more complex, interesting effects. Experimentation is the key!


